Ugly cucumbers with scars, chewed holes in cucumber plants? What is going on? Take a look around your cucumber plants, near the base, in flowers and on the leaves. You may find this devastating beetle wrecking havoc on your plants and cucumbers ~ The spotted cucumber beetle and striped cucumber beetle. Melons, summer squash, gourds, winter squash plants and fruits can be affected as well by these little buggars.
Make no mistake! These are not insects like the likable lady bug you want around. These disease carrying cucumber beetles will feed on rinds of fruits causing ugliness..aesthetic injury, bacterial wilt, squash mosaic virus, stunting, and even killing young plants. They become more active as the weather warms, feeding on blossoms, pollen, nectar, fruits and leaves.
Managing these cucumber pest require a bit attention. Left along they can ruin a entire seasons of harvest. Pure neem oil sprayed twice a week will slow and eventually stop any further invasion. Spray in the evening, when the bees have gone, being sure to spray the base of the plant, basically used as a soil drench to treat eggs and larvae. Persistence, I say!
Try companion planting! Radishes, calendula, catnip, nasturtiums, rue and tansy all work well. Marigolds are great, but plant the right kind or you may be attracting them rather than repelling them. Varieties like African, french or Mexican marigolds are your best bet!
This year we took our overgrown tansy plant and chopped (made a mulch, sorta speak) it up, sprinkled it around the base of our cucumber plants and saw a decline in beetles within a few days. However we still had to treat with neem oil.
Mulching also helps. Mulching can deter cucumber beetles from laying eggs near the plant stems, in the ground, but this does not deter beetles from feeding on flowers, fruit and leaves.
This year we have planted several different varieties of cucumbers. Muncher is top of the list of attack, while Marketmore fruits and have not been affected what-so-ever and the leaves are in the best shape.
Okay, with a little more fast knowledge of cucumber beetles and ideas to control them~ Go get um!
-
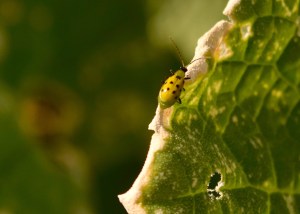
- Spotted Cucumber Beetle
-
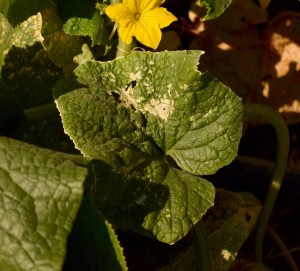
- Cucumber Beetle damage to leaves
-
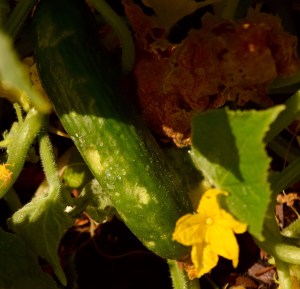
- Cucumber Beetle damage
-
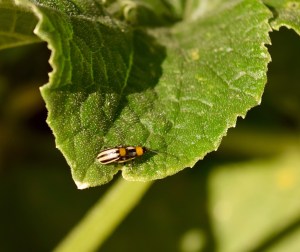
- Striped Cucumber Beetle