Author Archives: Ali

Ali's avatar

About Ali

Gardening is a peaceful place for me. I have loved it since I was a very young child. I want to share with you my journey in my small half acre lot in the middle of our city what you can achieve, such as gowing a garden, orcharding, caring for bees, goats and poultry. Going back to the simple life. Using what you have to the best of your ability.

Oh, those pesky squash bugs………..

This slideshow requires JavaScript.

This is the time of year your squash is or has been producing loads of squash.  Then one morning you go out to your garden to pick and there they are…..The dreaded squash bug.  YUCK! 

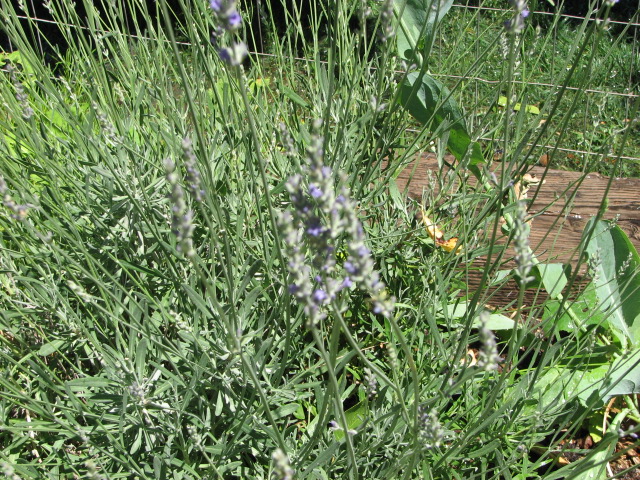
Squash bugs literally suck the life out of your plants. Squash bugs damage crops by sucking the sap from the leaves of the squash or pumpkin. They pierce the leaves with their mouth parts to feed on the plant. If the plant cannot withstand the amount of feeding, you will start to see damaged leaves around your garden . Leaves wilt rapidly and eventually turn yellow and then brown and crispy. In the early growing season, young plants are especially susceptible to death by squash bugs. Older plants are hardier, but excessive feeding will still kill them.  Female squash bugs begin to lay their eggs in early June through summer.  Eggs hatch within ten days and the nymph will become an adult within four weeks.

When I first started my garden I had, what felt like millions of squash bugs roaming my garden and destroying all my squash plants.  Over the years I have built my soil up by adding compost, organic fertilizers and nothing chemical to break down the soil, but rather, build up the soil and feed the earth.  The plants have become healthier due to the soil and therefore they are more resistant to bugs and diseases.  Last year I planted a pumpkin patch in an area that was a driveway/parking spot for 22 years.  Very compacted and no nutrients in the soil.  Once again I had a battle of squash bugs in that spot and just 40 feet away in my amended garden, not one squash bug dared enter.  But there are several organic choices to help you repel the squash bug.  Prevention is the first step to take. Once the little squash plants have emerged from the ground I sprinkle kelp meal around the base of the plant.  Not only does it feed the plant and give it the minerals it needs, the squash bugs don’t seem to like the smell of it and stay away.  I only use a couple of tablespoons and sprinkle once a week.  I have used with good success an organic spray called End All and another called Neem Py.  Both of these will kill nymphs, but seem to have little effect on adult as does a chemical, but they are a great spray to repel and kill the little ones.  I spray every 7-10 days through the season, but I never spray the flowers!  The flowers have visitors (your pollinators) and I don’t want to make them sick or discourage them.  It’s best to spray in the evening time.

It’s so important to pay close attention to your plants.  A couple of missed days can mean an infestation..  I inspect mine early morning.  Living in an arid climate I can give my plants a spray of water and come back a few minutes later and if there is squash bugs present, they will surface.  They don’t like the water and they run to the tops of the plants.  If you live in an area that is humid or cool, you won’t want to do this because you can cause powdery mildews.  Look under the leaves for movement.  Don’t let one of those little buggers get away!  If your squimish and don’t want to squish them, carry a jar with a little water in it to dump them in.  I had an old farmer tell me a trick he uses to get rid of his bugs, and for years I thought of it as silly.  Finally after I came to my senses and decided not to be close minded I thought I would give it a try……..Oh my goodness, it really works.  I have put a video on this blog so you can see how easy it is and how it works.  It’s a torch to burn the bugs.  Use a quick movement over the squash bug.  It quickly singes the bug without hurting the plant.  You don’t want to hold the torch in on spot or you WILL burn your plant of course, but a quick movement will do the trick.  The torch I use is (I robbed it out of my husbands tool box…shhhh!) is a bernzomatic TS 400.  It has an electric pizeo lighter which makes it quick to light and get the job done.   You can use it on the eggs as well, but you have to hold the flame on a little longer to kill the eggs, so it will scorch to leaves a little bit.

Over the years of amending your soil and learning fertilizing techniques to make healthier plants you will se a decline in squash bugs.  Remember that prevention is worth a pound of cure! Be patient and keep after those stinky little buggers!

15 Comments

Filed under Gardening

Heirloom Vegetables

This slideshow requires JavaScript.

I have been fascinated for years by heirloom vegetables.  The flavor can’t be beat out by the new and old hybrids on the market today.  The colors and variety is amazing.  Most veggies in the grocery stores are now hybrids which seem to lack the robust flavor of the good old varieties that grandma and grandpa once grow.  When you think of heirloom vegetables you might think of the tomato.  While the tomato is probably the most common and prized for as an heirloom there is a vast range of other veggies that are superior and should be considered in the garden.  The taste alone should be all the reason for growing them, but sometimes the names of heirloom vegetables are pretty fun to.  Such as the tiger melon, moneymaker tomato, cocozella di napoli squash, great white tomato, moon & stars watermelon and persimmon tomato.  There are thousands of varieties to tempt the gardener.  Most Heirlooms come with great stories on how they were named.  Take the ‘Mortgage Lifter’ tomato.  It was said that a farmers was able to sell enough tomatoes to pay off his mortgage.  Or the ‘Hubbard’ squash, for example.  There really was a Mrs. Hubbard who found this variety, which was later popularized by seedsman James J. H. Gregory.  The ‘Caseknife’ bean was developed in Italy during the seventeenth century, this bean is one of the oldest documented pole beans cultivated in American kitchen gardens.  Its name refers to the broad, slightly curing table knives once used in the late seventeenth century. 

Heirloom vegetables are old,  open-pollinated cultivars.   Meaning that a particular cultivar can be grown from seed and will come back “true to type” if not cross pollinated.  The next generation will look just like its parent.  Heirloom vegetables are those introduced before 1951, when modern plant breeders introduced the first hybrids, but many date from the 1920’s and earlier.  Many are 100-150 years old, and some are much much older.  Hybrids, sometimes labeled as F-1, will not come back true if the seed is saved.  Sometimes the seed  can be sterile and not sprout at all, but if it does sprout, the young plants will probably not have many of the characteristics that made its parent noteworthy and who knows what you will get.  Hybrids do have some outstanding qualities such as disease resistance, but reproducing themselves is clearly not one of them.

Every year I try several new varieties of heirlooms.  I always keep record of varieties that have produced well and the ones I probably won’t try again.  Some varieties may or may not be suited for your area and some my be susceptible to problems unknown to earlier gardeners.  Trial and error.  Of course that is gardening, isn’t it?  That’s how we learn.  Ask other gardeners which variety has done well for them or just try a few new ones each year.  In our area there are few heirloom tomatoes that produce remarkably well due to our long hot summers,  but I can’t imagine not having heirloom tomatoes in my garden!  Don’t plant all one variety.   Try a few new ones and plant some of the old standbys just in case.  Try other heirloom vegetables beyond the tomato.  For the first time this year I am trying the ‘Rutgers’ tomato, a common heirloom.  So far it has produced more tomatoes on it than any of my other tomatoes bushes.  I wish I would have planted more!  I tried a new cabbage last year, ‘Cour Di Bue’.  Without a doubt I have missed out over the years on this strange shaped, but yet beautiful large cabbage with a point on top and it has a fabulous flavor to.   I had to create a new growing area for a pumpkin patch with heirlooms like ‘Thai Small, Turner Family, Shamrock, Survivor and Speckled Hound’. 

Protecting our seeds is now more important than ever with the commercial agriculture market with genetically engineered (GMO) seeds.  Support seed companies that take pride in preserving our seed heritage.  Learn to preserve your own seeds for the future!  Grow Heirlooms!

1 Comment

Filed under Gardening, Heirlooms

Garlic Scapes? What Are They?

Garlic Scapes. They are all looking to the south!

This time of year you might hear about scapes.  They might show up in Farmers Markets if you are lucky.  Just what the heck are they?  Scapes are the long curly green leafless things that grow out of garlic, also known as garlic tops, garlic shoots, garlic spears or garlic flowers.  They are extremely tasty green shoots that grow from “heads” of hardneck (or topset) garlic which are usually discarded before harvesting in most of the U.S.  Garlic scapes are a versatile and nutritious culinary treasure that is valued in Korean, Chinese, Thai, Polynesian, and coastal French cuisine.  They can be hard to find if you don’t grow your own, but look for them late spring time, early summer.  They are garlicky but with a fresh “green” taste.  They can be used in any dish where one usually uses garlic but wants a brighter, more complex garlic flavor with less bite than one would get from standard garlic cloves.  Garlic scapes work well in soups, salads, stews, salsas, dips, guacamole, omelettes, frittatas, souffles, marinades, pesto, salad dressings, and stir-fry. 

Harvest garlic scapes when they are curled and the flowers have not yet opened.  By doing this you will produce a larger bulb and be able enjoy the scapes in cooking or raw.  I have found that the scapes growing in our hot climate can be tough the further down the stem, so at times I am only using the top 6- 8″ of the scape including the bud.  One little tip about watching the scapes as they grow is they will straighten when the bulb has reached full maturity.  By this time the flower will start to open.  You can also use the little flowerets before they dry out.  I like to sprinkle them over a salad or in any savory dishes.  They have a peppery taste.  Try something new!  That’s what makes growing your own so wonderful!   Garlic has such great character at all stages.

Scapes just picked for dinner

A simple but wonderful garlic scape spread can be made by chopping some up and mixing them with softened cream cheese (or sour cream) and dill. When added to mayonnaise to make an aioli, the flavor of chopped garlic scapes becomes milder and the savory notes are more apparent. Use the scapes as a great side dish.  Here’s a simple but good recipe for roasted garlic scapes.

Roasted Garlic Scapes

Take the scapes and put them in a lightly oiled roasting pan, top with salt (kosher or sea salt works best). Put the loaded and covered pan in a hot (425°F) oven for 30 to 45 minutes or until they are beginning to turn brown. serve as a side or main dish. Tastes like roasted garlic but creamier.

Garlic Scape Pesto

1 cup grated Parmesan cheese, 1/3 cup walnuts,  3 Tbsp. fresh lime or lemon juice, 1/4 lb. garlic scapes, 1/2-cup olive oil
Salt to taste

Puree’ scapes and olive oil in a food processor until smooth. Stir in Parmesan, walnuts and lime or lemon juice and season to taste.

Growing great garlic guide

3 Comments

Filed under Gardening, Recipes from the Garden

Lavender, A Must Have In The Garden

Gardeners have prized lavender for thousands of years.  Their usefulness and beauty made them vital in ancient Roman gardens, medieval monasteries, Elizabethan knots, english cottage gardens and shaker fields.  I love the way they look, the way they smell when I brush up against them when I walk by.  There are about 28 species of lavender.  The most commonly grown are English, Spanish and French.  I grow many English varieties because they do so well in our area.  French lavender is tender so I grow it as an annual or in pots so I can bring them into the greenhouse during the cold winter months.  Spanish varieties seems to struggle here, but I can’t seem to resist a few every year because the flower and growth habit is so different then the other cultivars.

lavender loves full sun and well-drained soil.  They can survive in partial shade, but they seem to get spindly.  The biggest killers of lavender plants are root-rotting diseases, which proliferate in high humidity and wet soil.  English lavender are especially susceptible.  If you live in a humid climate, don’t crowd lavender.  If one plant catches a disease, it is likely to move down the row until they are all gone.  You can increase drainage around lavender by planting in raised beds or in mounds.  Well-composted organic matter will also help to improve soil texture.  For real problem soils you can add cinders or chicken grit in the top 12 inches of soil.  lavender likes a soil pH of 6.5 to 7.5.  Lavender doesn’t require a lot of fertilizer, although I will feed a Well balanced fertilizer in the spring.  I use 2 pounds per 100 square feet.  Work into the soil surface several inches away from the main stem.  I don’t like to mulch my lavender.  It seems like if you try to amend the soil too much it will make the soil to rich and diseases are more abundant.  Don’t kill your lavender with kindness!  Rock gardens are a great place for lavender. 

How much water will depend on your soil, the climate, and the age of your plants.  Keep the soil moist, but not wet, only until the roots have established, which will take a year or more.  Established plants can survive very dry conditions, but they will be more attractive and productive if the soil doesn’t dry out too much between watering.  Make sure they get an inch of water every two to four weeks.  Overhead watering is fine in an arid climate like mine, but if you live in a humid area, drip irrigation would be ideal for watering. 

Lavender flowers are prized when they bloom.  The fragrant flowers only bloom for four to six weeks each year.  I start to harvest the flowers when they are in full color.  You can gather several long spikes and cut all at once for a quick harvest or you can cut each individually down to the first set of leaves for longer stems.  When cutting the flower spikes, I will prune  any dead out of the bush and trim up just a little.  The only other time I prune in is in the early spring, just before the new growth (not buds) begins.  This is just to shape it up, and clean the dead branches.  Never prune more than 1/3 of your lavender and never prune during a very cold spell.

All lavender can be propagated from stem cuttings.  You want non-flowering stems, 2-3 inches long.  Use a rooting hormone by dipping the freshly cut end into the hormone.  If using a powder make sure to tap off any excess powder and if you are using a liquid hormone, my preferred method, only let the stems soak for 10 seconds.  Place the cuttings into a sterile soil less mix.  I use a heating mat on the bottom during cold months.   Keep moist and out of direct sunlight till rooted.  

lavender are used in so many different ways.  Cut flowers, dried flower arrangements, cooking, potpourri, sachet and lavender wands.  I bundle the flowers and hang them upside down for  use in dried flower arrangements.  One of my favorite ways to “show-off” my lavender is making wands.  They are made by taking an odd number of fresh lavender (13 is a good number to start with for beginners) and tying off just below the blooms, bending the stems back over the flowers, and weaving ribbon around the stems.  The flowers hold their scent for years like this.  I like the english lavender best for these because they have the sweetest scent.

Cream Cheese with Herbs de Provence

1 lb cream cheese, 2-3 T half and half, 10 leaves of parsley minced, 4-5 marjoram sprigs minced, 4-5 sprigs summer savory minced, 4-5 fennel or dill sprigs minced, 2 t fresh lavender flowers, 2 garlic cloves crushed, 1/4 t sea salt, pinch of cayenne and 1 t herb or white vinegar.  Cream the cheese and half and half, add the rest of the ingredients.  Flavor improves after 2-3 days.  Cover tightly and store in refrigerator.  Use this spread on sandwiches, crackers or baked potatoes.

Well balanced fertilizer for lavender

Leave a comment

Filed under Herbs, Recipes from the Garden