Fall 2013

How can time get away from us so fast? Fall only began a few days ago, right? Fall planting for us began in August, when temperatures were still triple digits. We heavily sowed spinach, lettuce, arugula and other greens throughout August, September and October for a prolonged harvest. Cabbage, broccoli and all the greens we can pick have been the best we have ever had in fall. We have had a couple of freezes this year so far, but fair weather has blessed us. Brussels sprouts and cauliflower are just starting to head, so we are diligent to cover with frost blanket every night. While these crops are cold hardy, they really stay lush and grow a little faster with a bit more warmth in the coldest of nights. The turnips and beets are the size of golf balls. Perfect for roasting! I have never cared for turnips until I started growing them in the fall…..What a difference! Mabes, our spring adopted kitty (she’s six) likes to hide under the frost blanket. Every morning I remove the cover, she’s hiding under one of blankets to jump out like she’s saying “surprise, bet you didn’t know I was here”.
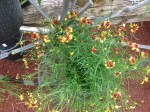
In the cold-frames we turned the soil with compost and a high nitrogen fertilizer to feed cilantro, mesclun and other small greens. Cold-frames are one of the best tools for our winter gardening. Spinach leaf edges can burn if they are left out in the harsh cold winds. One of my favorite winter time salads is mandarin oranges, spinach and toasted almonds with a balsamic vinegar dressing.
The greenhouse is bursting with lemons and limes for a winter treat. We do have to heat the greenhouse to keep it from freezing on those blustery freezing nights to keep the tenders safe and to set blossoms of new fruit. Because it’s warm at night in there, we can take advantage of growing cucumbers, tomatoes & basil for a taste of fresh summer in the dead of winter. We generally have tomato transplants ready to put in the greenhouse beds, but this year we had several volunteers pop up, so we are just going to let them go and see what we get. We should be eating delicious fresh tomatoes in January. Cucumbers are just now poking their heads through the soil. Once they are about 6″ tall we have to keep a close eye on the underside of the leaves for any insects, especially aphids. If aphids move in, we are on close watch to make sure they don’t take over. For a few aphids, we can rub them off. Spraying the leaves, including the undersides with an insecticidal soap will ward off any new comers.
Our crop of garlic this year has expanded to 58 cultivars. Rocomboles, silverskin, creole, artichoke, porcelain, asiatic, striped and turban are all planted with several cultivars in each group. This took several days of prepping the soil, garlic and getting it in the ground. Most were planted on the full moon, while other were put in the day before and after.  That is a lot of garlic to get in the ground!  Now that the garlic is starting to show its leaves, I’m questioning the amount I got in the ground… Your probably thinking, hum, bet she planted too much?! Nope, I think I had room for just a few more cultivars! Ha, garlic addiction!
New chicks arrived late September. Fall is a better time for us to add new chicks to the farm. They are laying by next summer, when the older girls are starting to slow up by hot weather and the new chicks lay right on through the first winter without slowing down when the days shorten. Plus, we are to busy in the spring time to give them the best care. The chicks are raised in a heated chicken tractor and when they are three weeks old, they are let to roam the orchard. The heat light is left on them until they are about 6 weeks old, when they have full plumage. Of coarse, if it’s really cold, we turn on the light at night. A few of our new chicks have found an attraction to Thistle, our black Nubian goat. They rest on her back several hours out of the day. I don’t know who likes it more. Thistle or the chicks. The chicks have a warm, wide perch and Thistle gets a great massage.
One of my favorite things about fall is the leaves. Such a palette of color from the golden yellows, rustit oranges and reds to caramel browns. We rake a lot here! And love every minute of it. The carpet of leaves on the lawns and in perennial beds are raked, moistened and tossed into the compost or turned into the soil so it can break down for spring.  If leaves are raked often, makes the work a little easier. Even if it’s only a wheelbarrow or two a day. I miss the days of our little kids jumping and hiding in the big heap of leaves. Plus they loved to rake too! Often times I find Casper, the perfect cat bedded right into a soft pile of leaves. Not a bad idea for a sunny fall day!
Every October we have a fall harvest dinner. We decorate with old glass bottles filled with fall flowers.  Tables and grass are dappled with pumpkins, winter squash and persimmons. Pumpkins are hallowed out and filled with dips and soups. The table is sprinkled with the deeply colored maple leaves, twigs and bark pieces from the sycamore.  Dinner reflects our bounty of fall harvests and a celebration of the new season to come.

Now that we are less than a week away from Thanksgiving and garden chores are down to a low roar, we somewhat get a winter break from watering, weeding and planting to replenish ourselves for early spring. Winter crops may need that occasional watering during dry spells, sunchokes can be dug for dinner, crops need continued harvest in cold frames and greenhouses and chickens still need to be feed. These are the things that a gardener can still enjoy during the winter months to keep grounded!

Have a Great and Happy Thanksgiving!

3 Comments

Filed under Gardening

Joe-Pye Weed, The Overlooked Fall Bloomer

Years ago when we put up our first greenhouse, I wanted to start every herb I could get my hands on from seed. Joe-Pye Weed was agonizing. I could never get it to germinate. Perhaps the seed was old. Year after year I would buy more seed only to fail over and over. On one of our vacations we stopped at a small nursery in Moab Utah on the way home and there it was! Joe-Pye Weed! It was towering out its one gallon pot with its huge pink flower heads. I was in love and of course it come home with us along with many other plants from cute little nurseries on our travels…. And now that I have my specimen, I have no problems starting it from seed.

A little history; Joe-Pye Weeds botanical name is Eupatorium. It is also known as Boneset, Purple Boneset and Gravel Root. The King of Pontus, Mithridates Eupator discovered the use of this plant as a medicinal tonic and it was named after him, “Eupatorium”. Joe-Pye, its common name comes from the name of an Indian name Jopi who used it medicinally as well. It has been used to relief pain of the fever, break-bone fever, to fight typus, to dissolve kidney stones and an affective diuretic. Its quiet bitter to taste.

The roots are the parts used for making tinctures and can be harvested at anytime, but it’s best harvested in the late fall for the strongest qualities. Harvesting should be done after this perennial has been in the ground for two years.

Joe-Pye Weed is easily grown in full sun, moisture-retaining, but well drained soil. When grown in a shady spot it can get floppy. It is an excellent showy fall blooming plant that should be grown in the back of flower beds, reaching over six foot tall. It pairs beautifully with Snow on the Mountain and Goldenrod. Moderate fertility is enough to feed this awesome performer. Joe-Pye Weed does better when the soil isn’t allowed to dry out. It can be become rather scruffy and tattered looking if it doesn’t get enough water. It forms huge flower heads ranging from a light pink to a deeper rose-purple depending on the variety.

This plant is not flashy as a small immature plant in pots. We grow this every year for our nursery and most people snub it off. Perhaps it’s the name that has “weed” in it that turns their noses, but come summer time and they see it in our demo herb bed, most everyone says with great excitement, “what is that plant?”.  It’s not a weed or invasive so even if you don’t have typhus or kidney stones, but have a sunny location, you might want to give Mr. Joe-Pye Weed a spot in your landscape!

Leave a comment

Filed under Flower Gardens

Love Those Perennials!

I love perennials and this is the time of year most of them are bursting with color!  Unusual Rudbeckia, Salvia and Echinacea are some of my most loved sun perennials.   Perennials are considered  low maintenance plants, but as any perennial gardener knows, this does not mean no maintenance.  The biggest plus side is you don’t plant them every year, they last for years and they get better and better as they become more mature.

Most perennials need food, water, dividing and deadheading to keep performing well.  Perennials can be planted in the spring or fall when the weather is kinder to transplanting.  When planting them, amend the soil well with compost and add a couple of tablespoons of fertilizer (preferably a slow release organic fertilizer) in each planting hole.  This gives them a good jump-start.  Keep them watered well to begin with.  They need to get their roots established before they can withstand fewer waterings.  Some are more drought tolerant then others, so read your tag and let the plant tell you what it need.

Make sure you plant your sun loving perennials in the sun.  Several years ago I planted a beautiful sun-loving perennial bed loaded with beautiful plants like Joe Pye Weed, Echinacea, Hardy Hibiscus, Rudbeckia and others.  The trees have now grown up and the bed has become very shady.  These sun lovers are now lanky and have small blossoms.  They need their sunshine to thrive.  Later this fall these perennials will be lifted, shared, re-potted and…..probably put into a “new” sunny perennial bed.  As my husband would say “imagine that, another flower bed!”.

The same thing goes for shade perennials.  When shade plants are planted in too much sun,  the leaves burn, plants will stress and possibly die.  Here in our hot climate, if the tag says part to full shade, I will always put in full shade.  The intense sun rays will burn the plant in the middle of summer even in the morning.  Shade plants don’t have huge blooms.  They are generally more subtle, being smaller in size and not as bright with a few exceptions.  But you I can’t imagine not having plants like Heuchera or Hostas.  The whimsical airy flowers are slightly fragrant and charming.

Deadheading……..arggg…..Yes you should do this if you want BIG blooms.  When a perennial flower is left it will produce seed.  Producing seed takes energy.  Energy that is need to produce more flowers.  Unless you are wanting to collect the seed you should deadhead.  In other words, cut off the blooms that are past their prime.  Don’t just cut the top of the flower off leaving an unsightly stem, cut it off just above a leaf.  I prefer to cut down further where there is a bud.  I found some great little scissors that are perfect for deadheading.  Here is a link to check them out.  They are sharp and they spring back making it easier on your hands.  While this may seem tedious, if it’s done on an evening garden stroll weekly it can be conquered rather quickly in a few short minutes.

After the perennials freeze, cut back the dead growth about an inch above the soil level.  I like to spread a layer of mulch or compost for winter protection.  This acts a an insulator for the roots and lessens the chance of damage to extreme cold weather.  I have found my perennials come back healthier and sooner in the spring when I do this.

Keeping my perennial beds pretty in the early spring is easy!  While most of my perennials are sleeping,  I still have plenty of spring color splashed throughout the beds to keep spring bright and beautiful.  Pansies, primroses and bulbs are a bright and cheery site while the later bloomers are just peeking through the ground.  By the time the pansies and bulbs are finished for the season the perennials take a bold stand and bloom through the summer into the first frost.

Perennials are usually found abundantly in the fall as established plants.  Look for rich healthy growth and get them in the ground and enjoy them for many years to come!  Now, I’m headed out to do some perennial maintenance of my own!

Leave a comment

Filed under Flower Gardens

Growing Your Own Fresh Figs and Using Them

I have to admit that I was never fond of figs until about 10 years ago. But, the silly thing is I never knew why! How could I have not have liked figs if I never tried a fresh fig. Heck, I liked fig newtons! I even planted a fig tree in my orchard. Okay, so I am a stubborn creature…. Luckily I finally gave them a whorl once the tree started to produce and now it is one of my favorite trees in the orchard.

Figs are a Mediterranean plant. They are hardy in Zones 8 to 10, but can be grown in pots that can be brought in out of the harsh cold winters or planted on the south sides of buildings for extra winter warmth and protection from harsh winds and should be bundled with a thick layer of hay or straw and burlap. A properly wrapped fig tree should survive winters even down to Zone 6 sometimes colder. When temperatures drop below 10 degrees Fahrenheit without proper protection, figs will be lost to the cold! Moral of the story is, if you live in zone 7 or lower and you are not good at doing protective covering, you might be better off planting figs in containers.

There are over 200 fig cultivars grown in North America with a wide range of color and shapes. Most figs are self-pollinating, outside of a few odd balls, so no need for a pollinator! I have grown several varieties here, but have found my favorites are Black Mission, Kadota, Brown Turkey and Celeste. These cultivars do well here and are full of flavor.
Figs will fruit two, seldom three, different times during the season on new wood. The first starts here in June, giving off the biggest best fruits and the second is late summer. Although the second harvest is smaller fruits, it always seems to last a little longer in the season sometimes continuing a month. Many times in mid to late September new fruit starts to set. Because of the cold weather they tend to grow slow and rarely do they ever mature unless we have a very late frost.

Luckily for us, figs like a more alkaline soil and lots of sun! If you live were the soil is more on the acidic side, apply lime around the base of the tree. Keep figs well watered during the fruiting season to assure proper ripening and larger fruit. Apply rock phosphate around the base of the tree in early spring and mulch with plenty of compost.

I was told once to dip my finger into olive oil and coat the bottom of each fig to hasten the ripening. Well, when you have thousands of figs on one tree, that hardly seems sensible, but for potted figs, I can assure you, it really does the trick! The figs touched with olive oil mature and ripen ahead of others.

Harvest often! The warmer the weather, the faster they ripen. Figs will become soft to the touch when ripe and sometimes the skin will begin to split. Know the color of your figs while some are a light golden-green and others are dark brown or blue/black when ripe.

As far as pruning figs, Keep the suckers that sprout at the base of the tree and any suckers that form from the roots. Keeping fig trees open makes them much easier to harvest the fruit. Figs will grow rather informal, so prune to keep under control and open. Keep dead and damaged branches removed. Figs can be espaliered, but you have to keep on them all time to manage a good-looking espalier tree.

Figs are generally disease and insect free. Our biggest problem is ants that climb up the branches to feed on the fruit, but a layer of wood ashes keeps them at bay. Birds can be a serious pest problem. Once they taste the ripe fruit, well they are on it like BIRDS! Netting works well for smaller or containers figs trees.

What to do with all those figs…..Figs will spoil rather quickly. Making a puree out of figs by simmering them with a touch of honey and lemon for 20 minutes then running them though the food processor and freezing them makes a great filling for cookies like fig bars or it can be spread on toast.
Dehydrating them is a super quick and easy way to preserve figs for winter snacks, or even chopped up and put in whole wheat breads.

Carmel Candied Figs

Fresh Black Mission Figs

Fresh Black Mission Figs

Left over fig juices

Save the left over fig liquid reduce with balsamic vinegar for balsamic vinegar.


A friend of mine shared a recipe with me this year and I have enjoyed it more than anything I have done with figs. It’s called Carmel Candied Figs. While it takes days to make, it is a very easy process. Day One; Place 6 pounds of figs in a heavy stock pot, adding 1 cup honey, 1 cup water and simmer with a lid on for 1 hour. Swirl the liquid, but don’t stir the figs or they will tear. Let sit overnight. Whole spices can be added like, cinnamon, star anise or allspice, but it is not necessary at all! Day two; simmer figs without lid for 1 hour. Let sit overnight. Day Three; simmer figs without lid for 1 hour. Cool. Line 2 cookie sheets with parchment paper. Place figs, stem up, flattening slightly on cookie sheet and place in an oven with pilot light. Turn figs over, belly side up, the next day, turning a few times a day from stem side to belly. do this until figs are chewy. It usually takes about three days, depending on the humidity. I store mine in glass containers with a lid, but leave the lid ajar for a week to remove any extra moisture. Extra moisture will cause mold….You don’t want that to happen. They can also be frozen at this stage. These delicious figs can be eaten like this alone or can be added to fall breads, muffins, scones, custards or whatever you set your mind too!  TIP:  Save the left over liquid form cooking the figs down and add to two cups of regular balsamic vinegar, reduce by simmering for several hours.  Here is your own fig vinegar for making the best salad dressing you’ve ever had!

4 Comments

Filed under Fruits from the orchard, Preserving